How to Create and Scan Your IP/Domain
In the Scanning portal, users can create scans to identify vulnerabilities in their systems. A scan is associated with a target, and each target containing the IP addresses or domains to be scanned.
Scans are a vital tool for assessing the security posture of your assets.
Scan Components
Each scan includes the following components:
- Target: The target defines the specific hosts (IP addresses or domains) to be scanned.
- Schedule (Optional): You can set a schedule for the scan to run automatically at specified times. See Create a Schedule for more information.
- Scan Config (Profile): Specifies the configuration settings for the scan.
note
For the PCI product, you cannot select a Scan Config. The default configuration adheres to PCI ASV standards.
- Scanner Engine: Determines which scanner engine will be used for the scan.
note
If your subscription includes the internal scanner feature, you can choose to use an internal scanner.
Creating a new scan
To create a new scan, follow these steps:
- Navigate to the Scans section from the portal menu.
- Click the New Scan button to open the scan creation form.
- Fill out the fields:
- Name: Enter a name for the scan.
- Target: Select the target to be scanned or create new target by clicking the New Target button.
- Schedule (Optional): Define a recurring or one-time schedule.
- Scan Config (Optional): Select the scan configuration settings.
- Scanner Engine (Optional): Choose the scanner engine to be used for the scan.
- Click the Save button to create the scan.
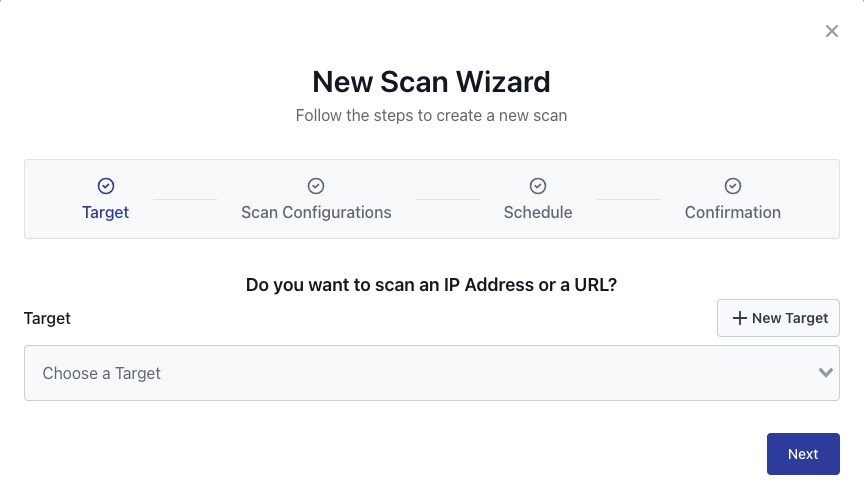
Create a scan from the New Scan Wizard
We have created a New Scan Wizard that you can use to create a scan step by step:
- Click the New Scan option that is available in the + icon in the upper-right corner of the menu.
- In the first step, create or select the target.
- Select the scan config (if it is available based on the product).
- In the next step, create or select the schedule (optional).
- In the last step, review the scan details and click the Save button to create the scan.
This wizard provides a faster and more streamlined way to create scans.
Running a scan
If not schedule is set, you can run the scan manually by clicking the Run Scan button on the Scans page.
Scheduled scans will run automatically at the specified times.
Reviewing scan results
Once the scan is completed, you can view the detected results and vulnerabilities in the Results -> Vulnerabilities section and generate and download the reports in the Results -> Reports section.
For additional information on the scan results and reports, see Getting the Results and Reports.