Create a Schedule
To manage your scanning schedules, navigate to Menu → Options → Schedules. Here, you’ll see an overview of existing schedules and the option to add a new one.
Adding a New Schedule
- Click the “New Schedule” Button: This will open a form to define your schedule’s parameters.
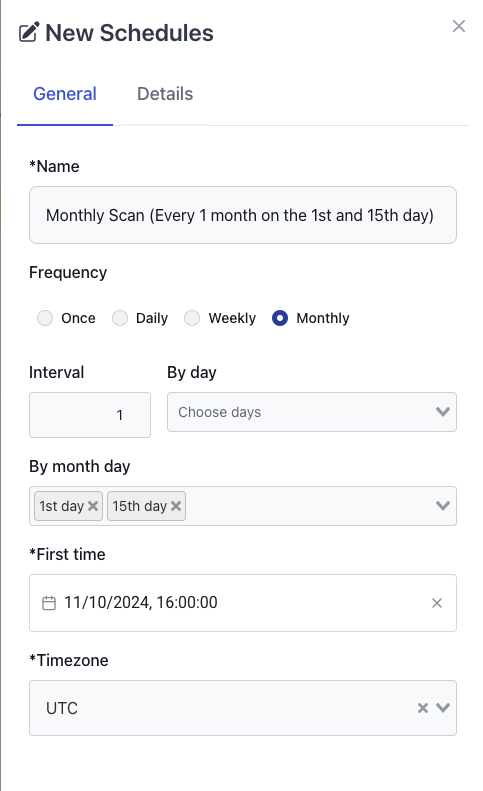
- Fill Out Schedule Options: Configure options like First Time, Frequency, Interval, and Timezone based on your needs.
- Save the Schedule: Once configured, save your schedule. It’s now available for assignment to scans.
info
A schedule can be assigned to multiple scans. For instance, if you have scans that should run monthly, you can reuse a single monthly schedule across those scans.
warning
Editing and Deleting Schedules
- Non-Editable: Schedules that are currently assigned to one or more scans cannot be edited. This restriction helps maintain consistency across all scans using the same schedule.
- Non-Deletable: Similarly, schedules in use cannot be deleted to prevent disrupting scans that rely on them. If you need a different schedule, consider creating a new one instead.
Example Use Case
Below, we’ve provided examples of common scheduling configurations, complete with screenshots to guide you through each step.
Monthly Recurrence
Setting up a scan to run monthly, with advanced settings for day selection
